Blog Post Title One (Copy)
Rouge Hills Hideaway
A small renovation with a big personality
The Interior Design Process from Concept to Finished Product
FROM THIS

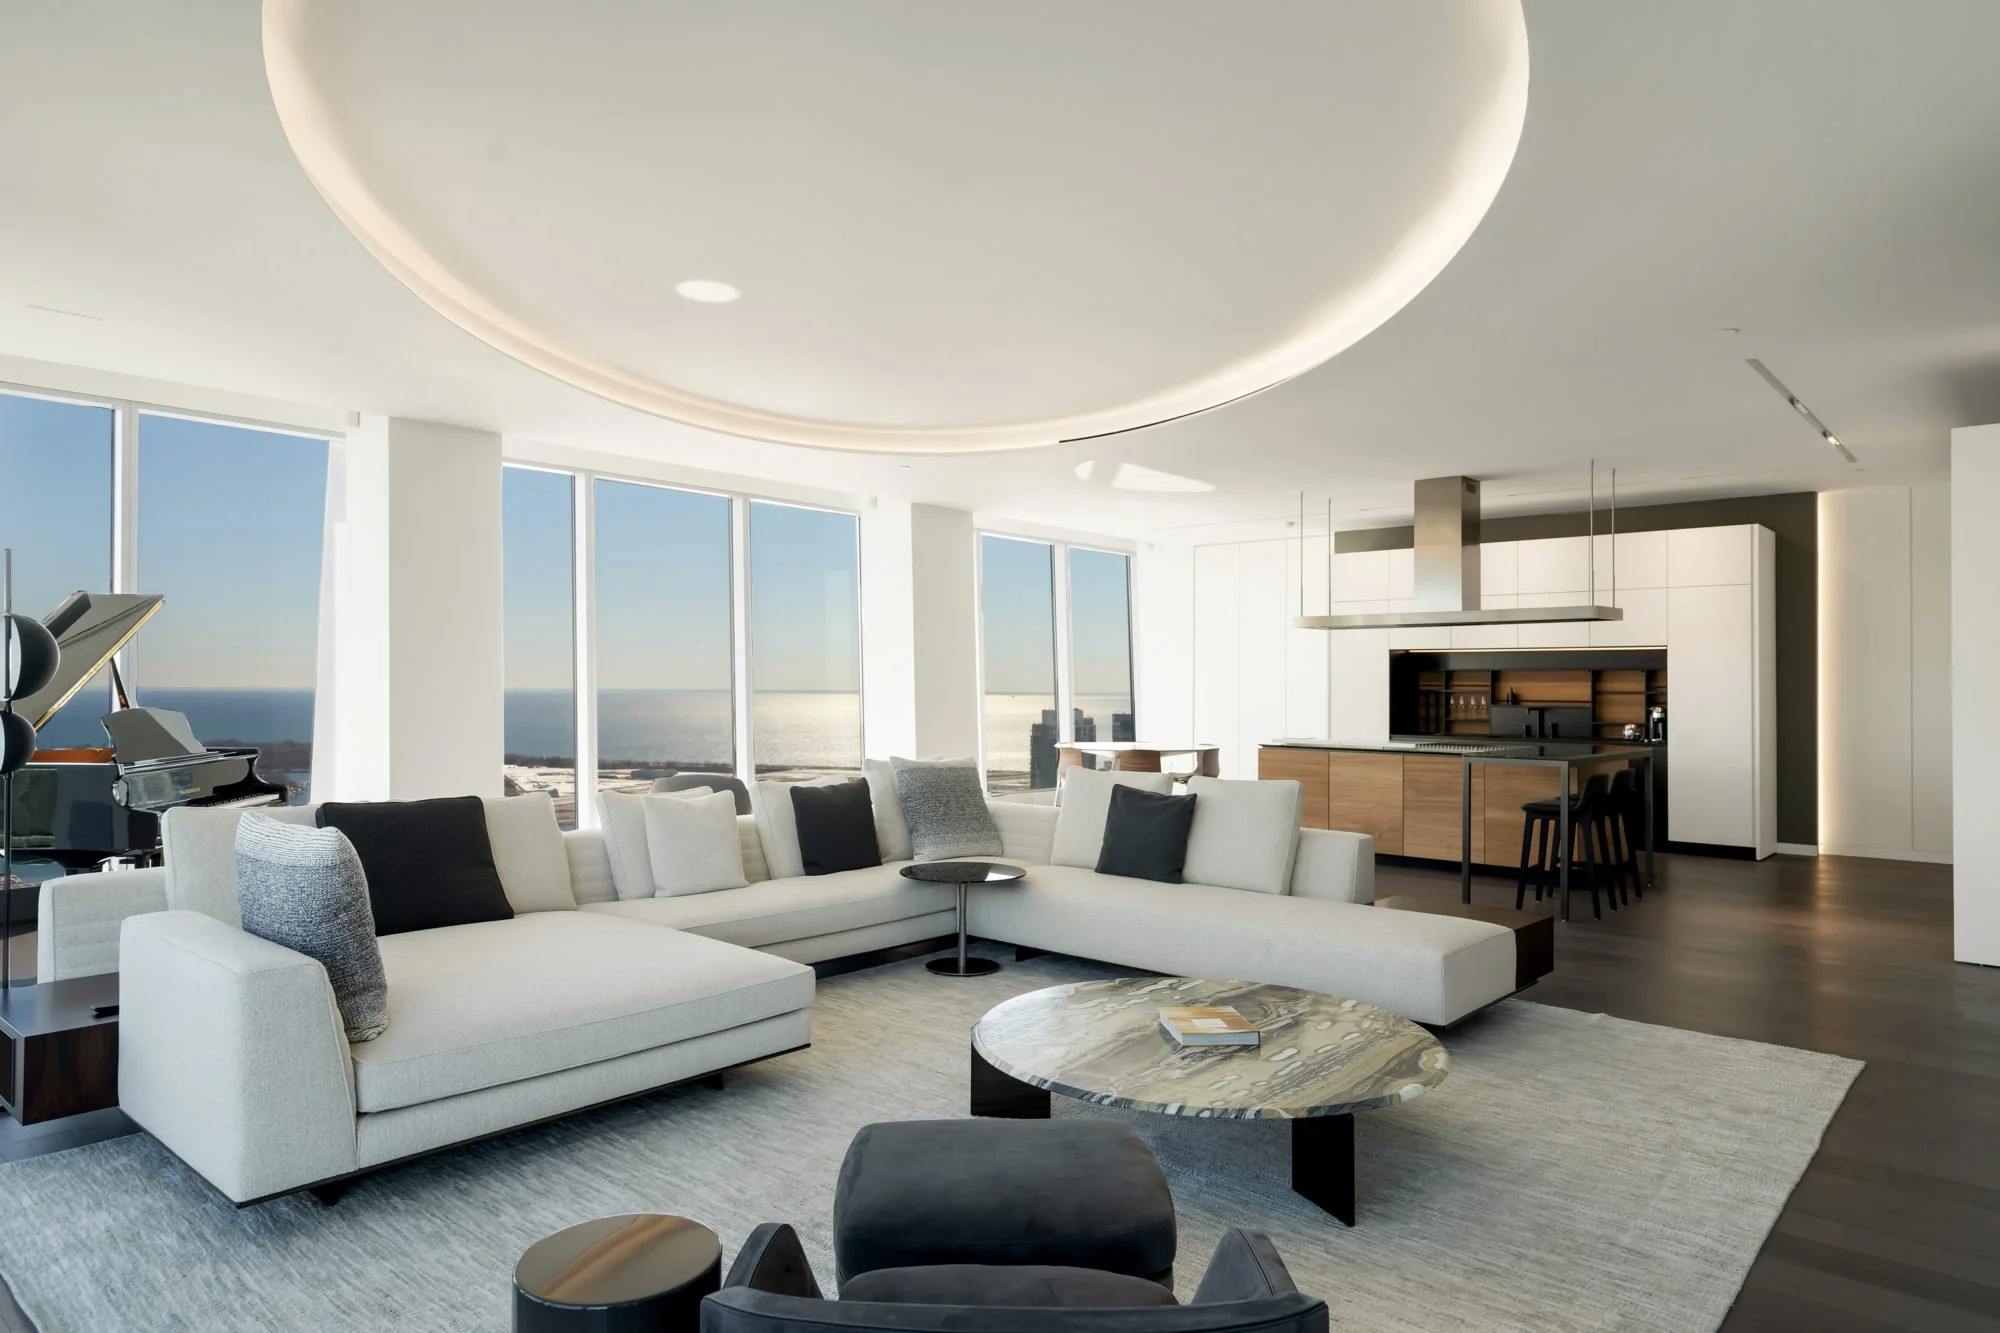
TO THIS

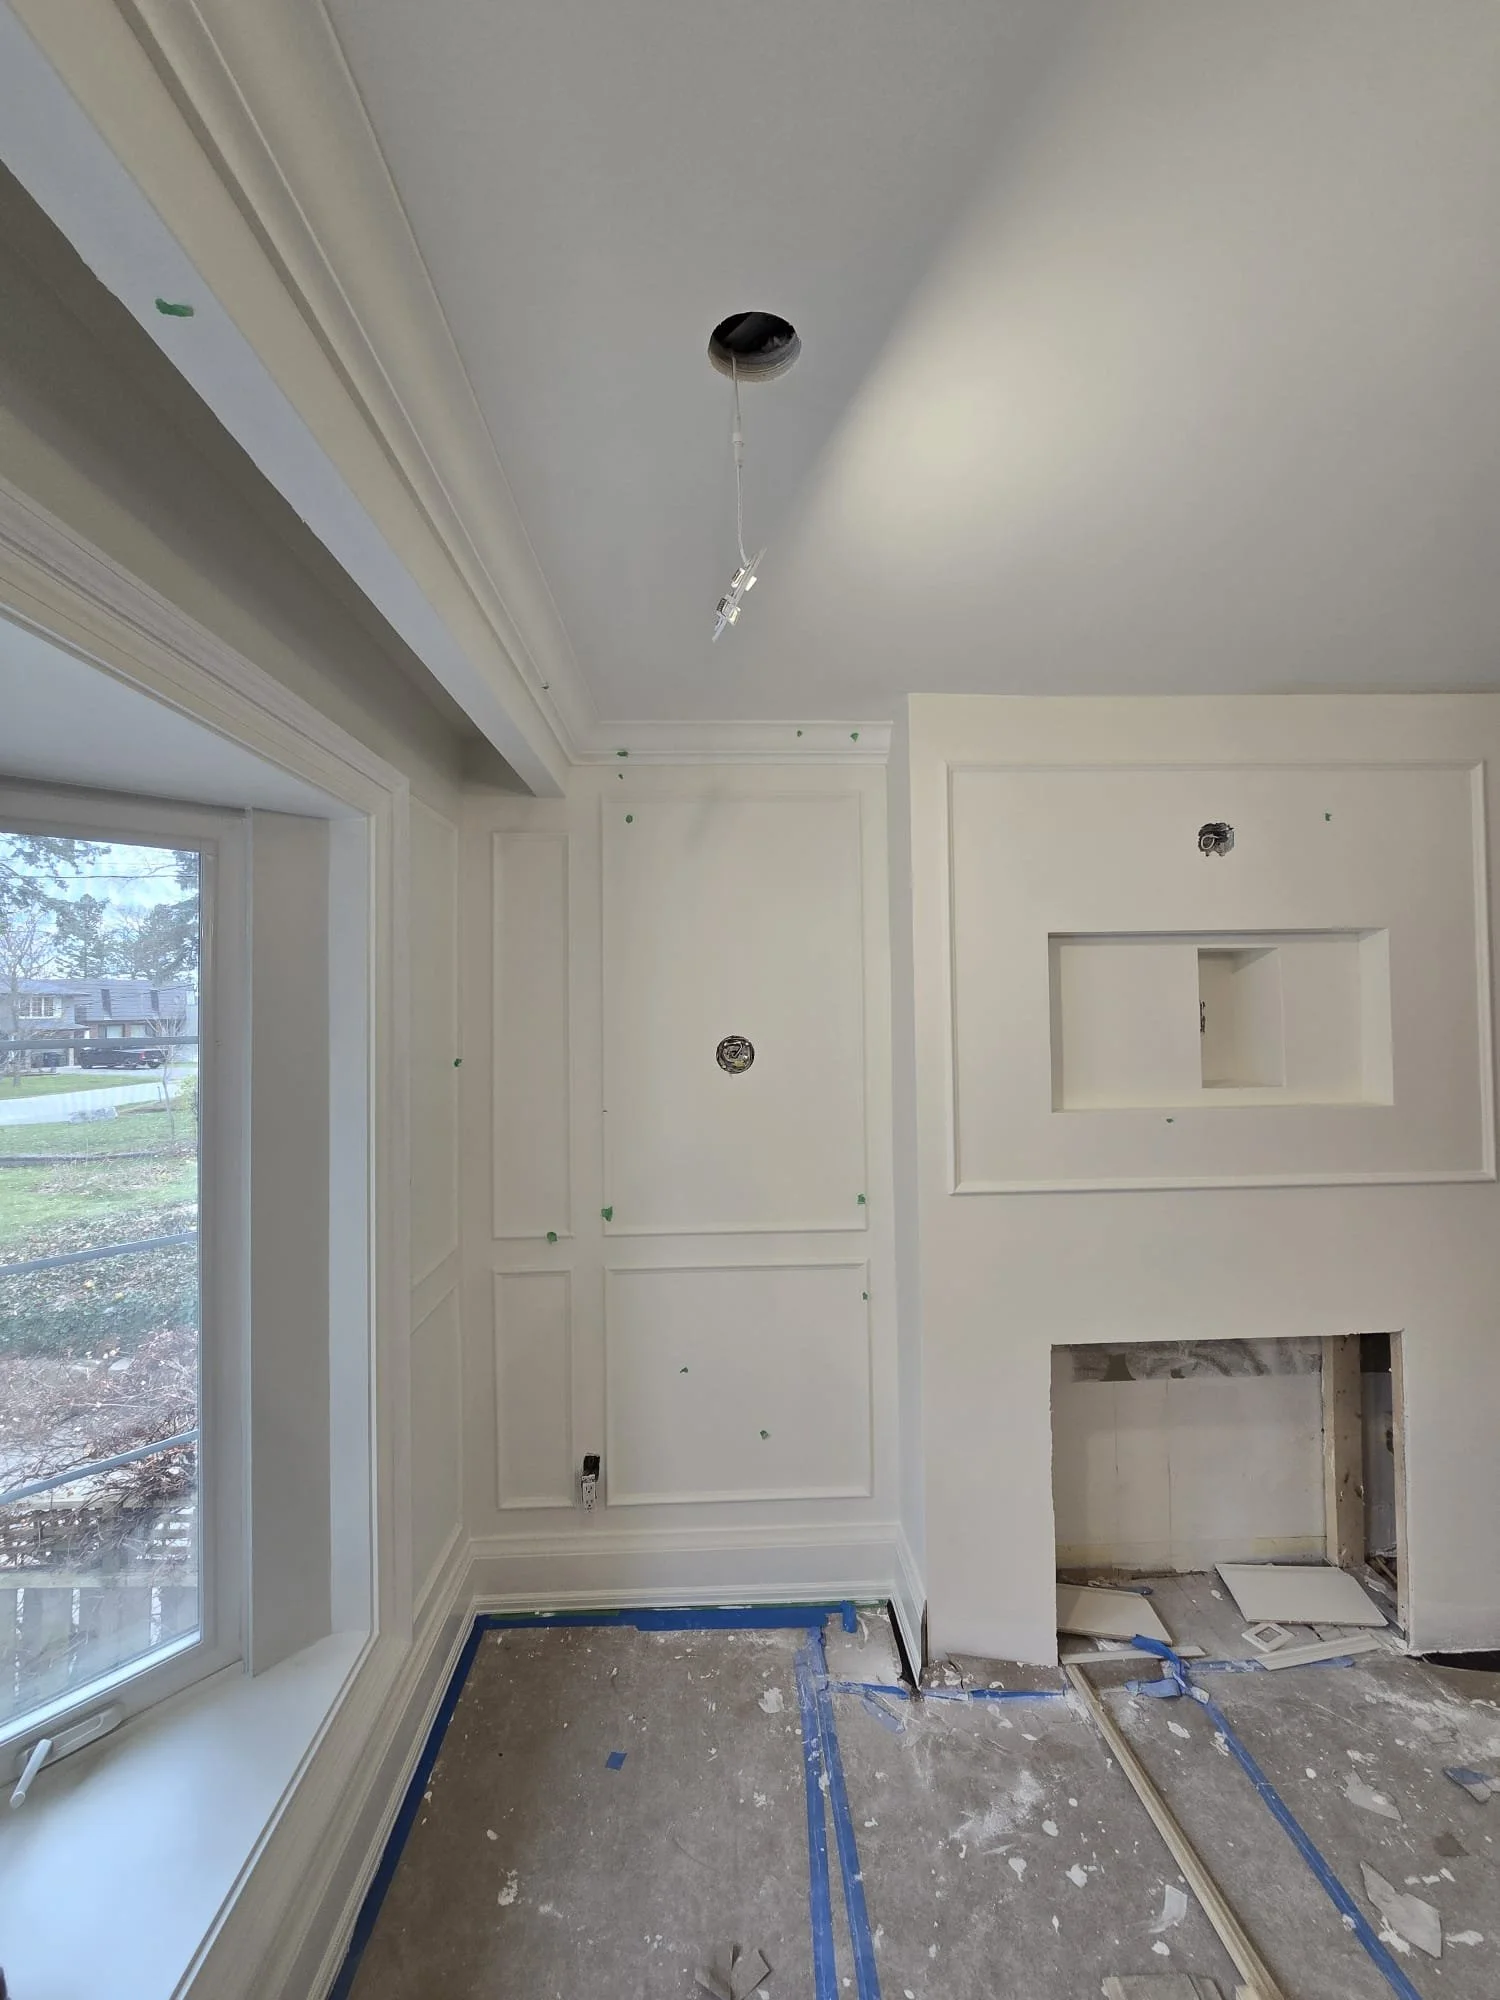
The Beginning, The Existing Space
You might find yourself scratching your head about why your space just isn’t working. Or maybe you know why it isn’t working, but you can’t figure out how to fix it. Even for a designer, with all of the measurements in-hand and every software under the moon, the solution isn’t always that clear.
In this Rouge Hills home, there were two things that were nagging at this client. The split-face stone they chose to wrap around the wall that ran from their ground floor to second floor felt like it had gone out of style, and the distance of their sofa to the TV was too far. But there didn’t seem to be a better way to arrange the room — a perfect example of thoughtful Interior Design Toronto.
Our first step is always to survey the room with a 3d scan, as well as a good old-fashioned measuring tape. Once we receive the 3D model, we can start testing out different layout scenarios. Here is what the room looked like before.

The split-face stone was starting to feel dated.


The distance from the sofa to the TV is too far.


The sofa wasn’t spacious didn’t have room to put your legs up.

Here are the different layouts we tried and discussed with the client.

In order to get the sofa and TV to a better, this first layout splits the room into two sections. A lounge by the new fireplace, and TV zone.

This layout introduced the idea of a half-wall for a TV to stand or be mounted on, and the lounge on the other side of it.

This layout splits the area in two as well, but with the TV above the new fireplace, and the lounge area by the stairs. We ultimately went with this layout.

Sometimes we wonder if the problem is the bigger picture and suggest something more dramatic. The dining room’s existing position was on the bottom left, and we suggested swapping the living room and dining room because the proportions suited the functions of those spaces better. Ultimately the client didn’t go with this one, because the void at the top left corner is actually the kitchen space, and they liked the adjacency.
The Concept
Once the preferred layout was selected. We analyzed the clients concept photos and what exactly were the elements that we should incorporate into this new space were. Here are some of those images.
The clean lines and the ribbed sofa back.

The slatted deep walnut wall with a stone accent within.
Design Development
We got to work developing the design and selecting furniture pieces and lighting fixtures. The large wall that soars from the ground floor to second was the greatest design challenge, in that we settled on what we wanted the front to look like, but the back was an unknown.

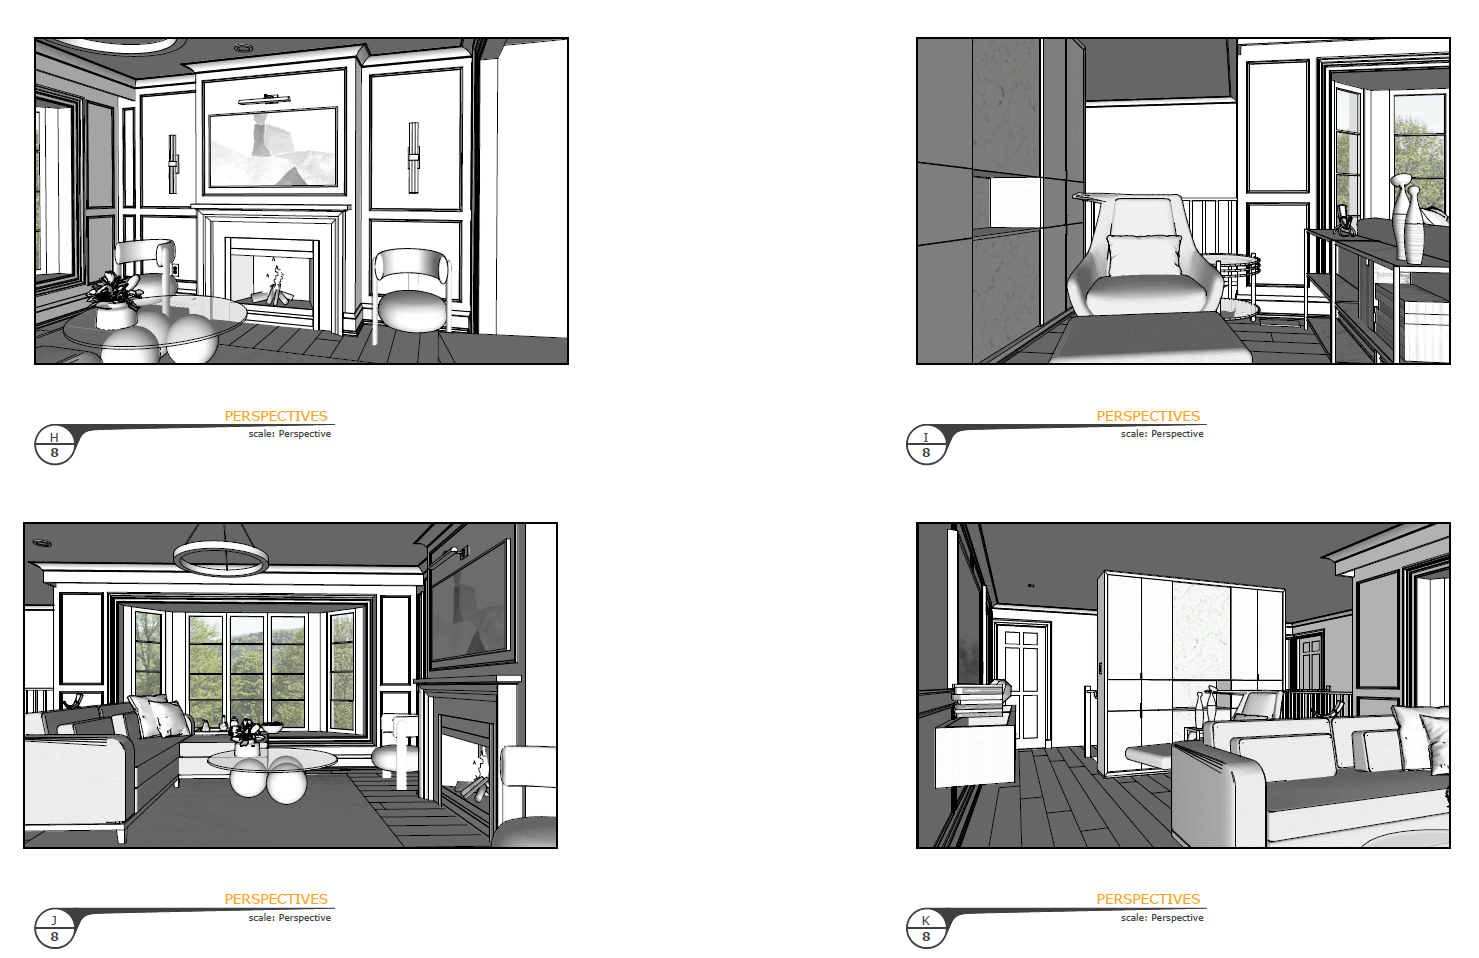
(3D Rendering) The fireplace/TV wall came together easily. We removed the existing console that spanned from wall to wall (which we re-used on another wall) and built-out the wall for an electric fireplace. We kept the details classic and elegant. The lighting and furniture options shifted along the way, but the design of the wall remained unchanged throughout.

(3D Rendering) We used a careful selection of wood mouldings to create the profile of the fireplace mantle and surround, leaving enough space for a stone surround that would match the bar area stone selection.

(3D Rendering) We explored back painted glass, but decided against it.

(3D Rendering) We wondered about a long horizontal opening and flat wood panels.

(3D Rendering) Ultimately we landed on the slatted side doors with a full-height stone inlay and horizontal bar opening.
But then there was the back…

What about keeping it simple flat wood panels?

What about flat panels with an interesting pattern?

What about a stone accent like the front?

What about some upholstered panels, stone and brass accents?

What about a little bit of everything with clean modern lines?

What about all slats with art pieces?
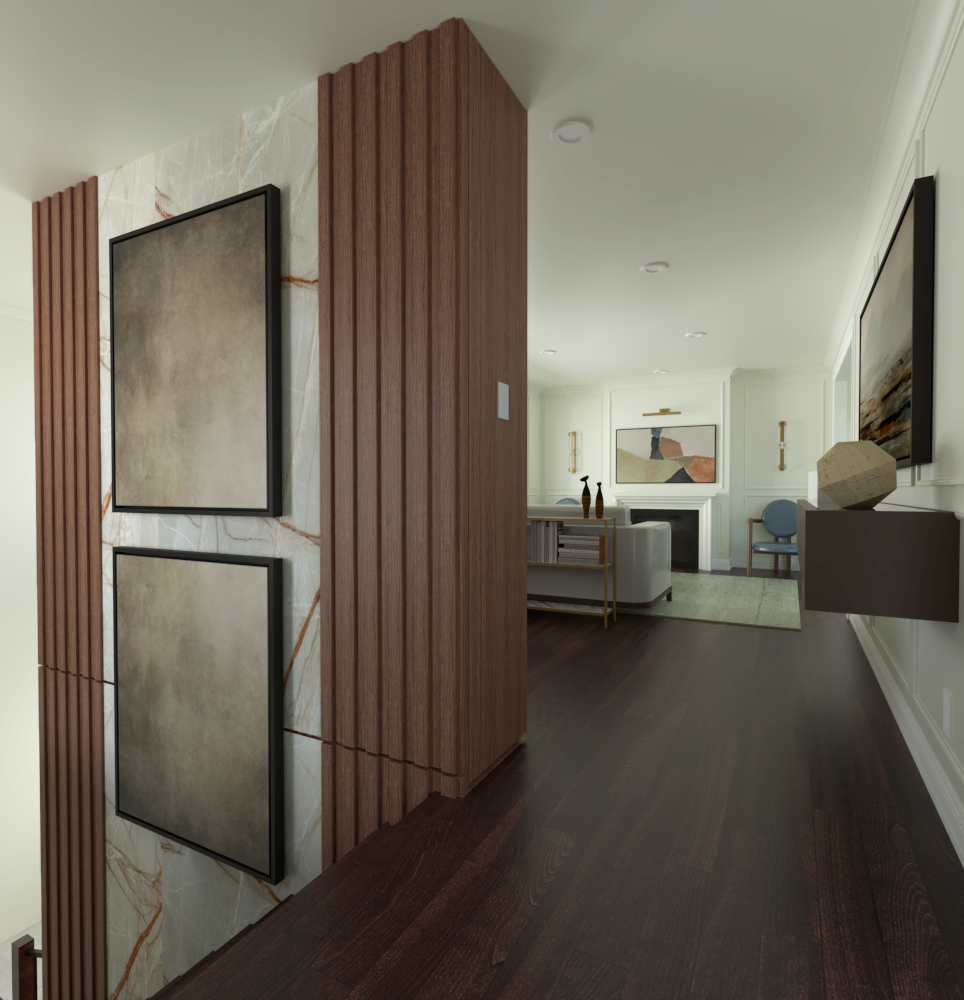
What about the same as the front with slats + stone, but with art pieces?

What about upholstered panels instead of stone + art pieces? We ultimately landed on this option.
As you can see, there is a lot of time, thought and effort put into these decisions, and our 3D rendering process makes it so much easier to visual and help with the final selections.
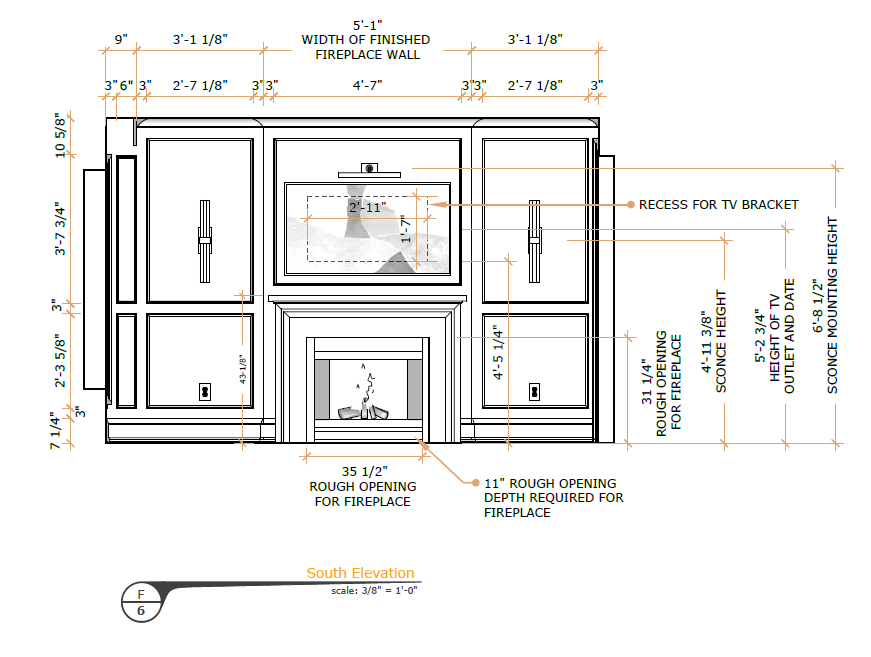
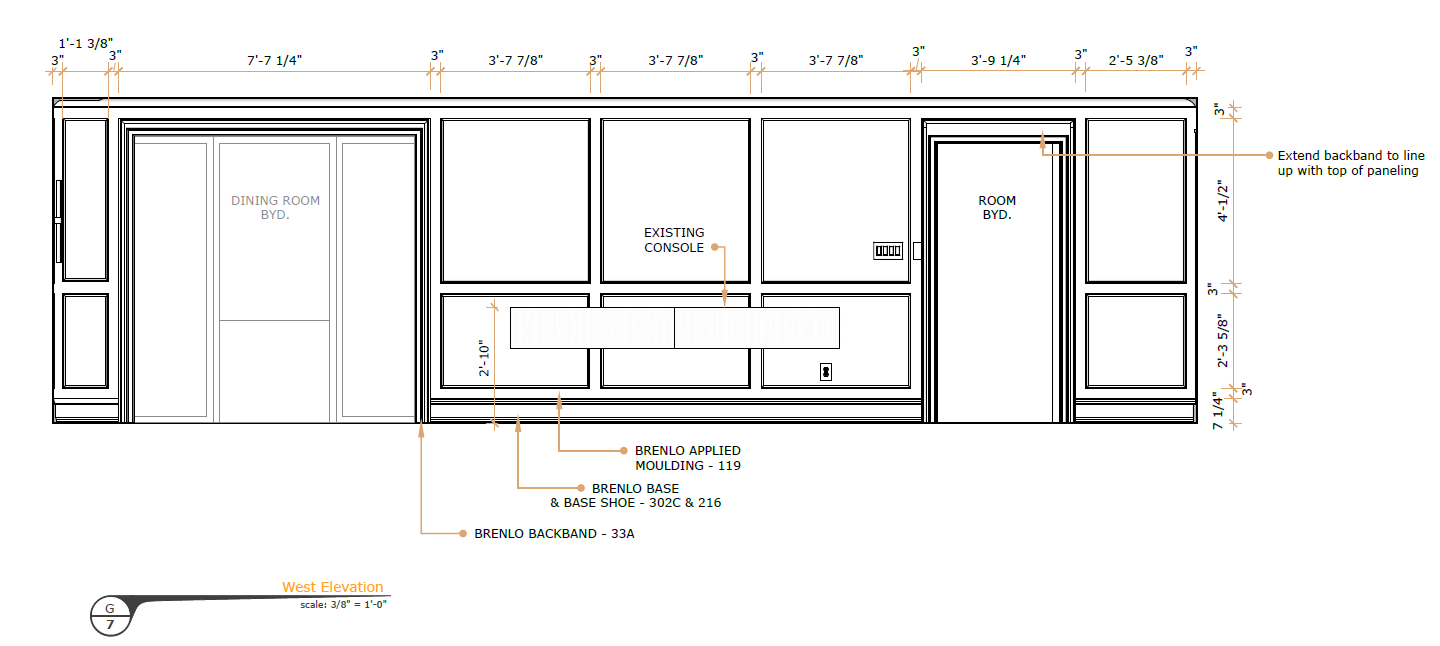
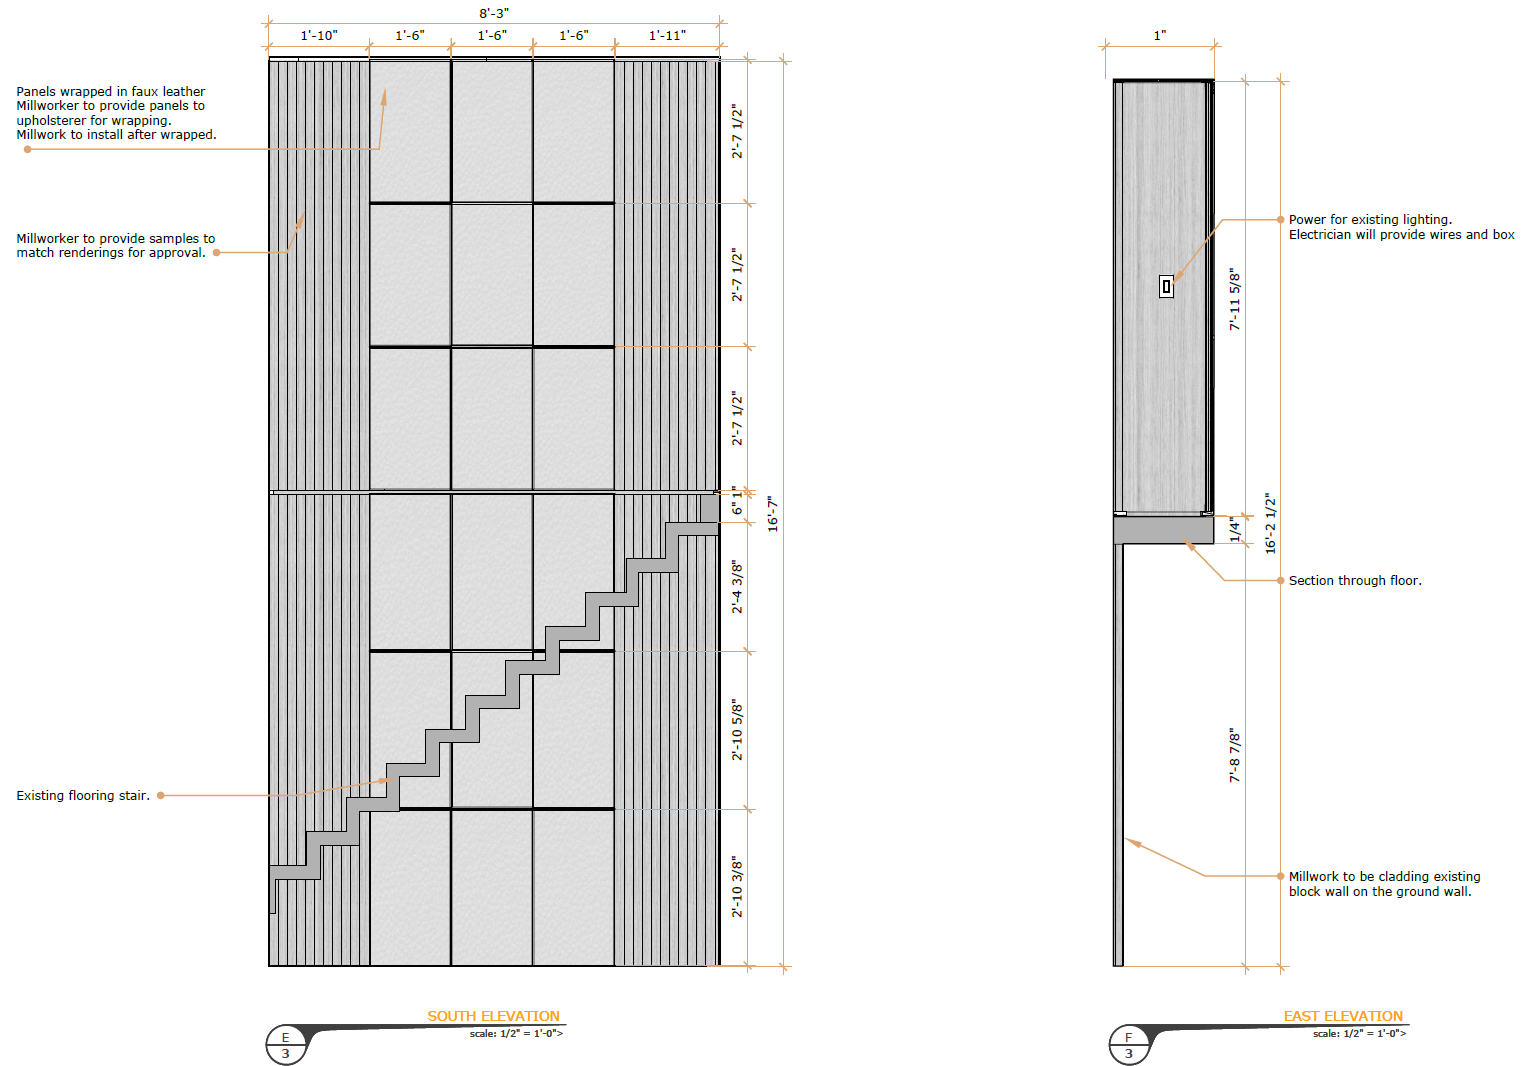
Drawings and Construction Documentation
Perhaps this is the boring part, but it’s an incredibly crucial element to the design and construction process. It’s one thing to have the pretty pictures, but everything needs a measurement and specification to make the process go smoothly and make sure your design comes to fruition accurately.


The Construction Process
Bit by bit, everything comes together. But first, it must come apart! It starts with demo, then framing, electrical, drywall, trim work, painting, millwork and stone. There are so many steps to the process and most of them cannot overlap. In this case, the clients continued living at home throughout the process, so they had to accept the pain of having dust make it’s way into every corner, no matter how hard every tries to minimize it. As well as having trades people come in and out for months, making noise and sometimes staying later than expected.
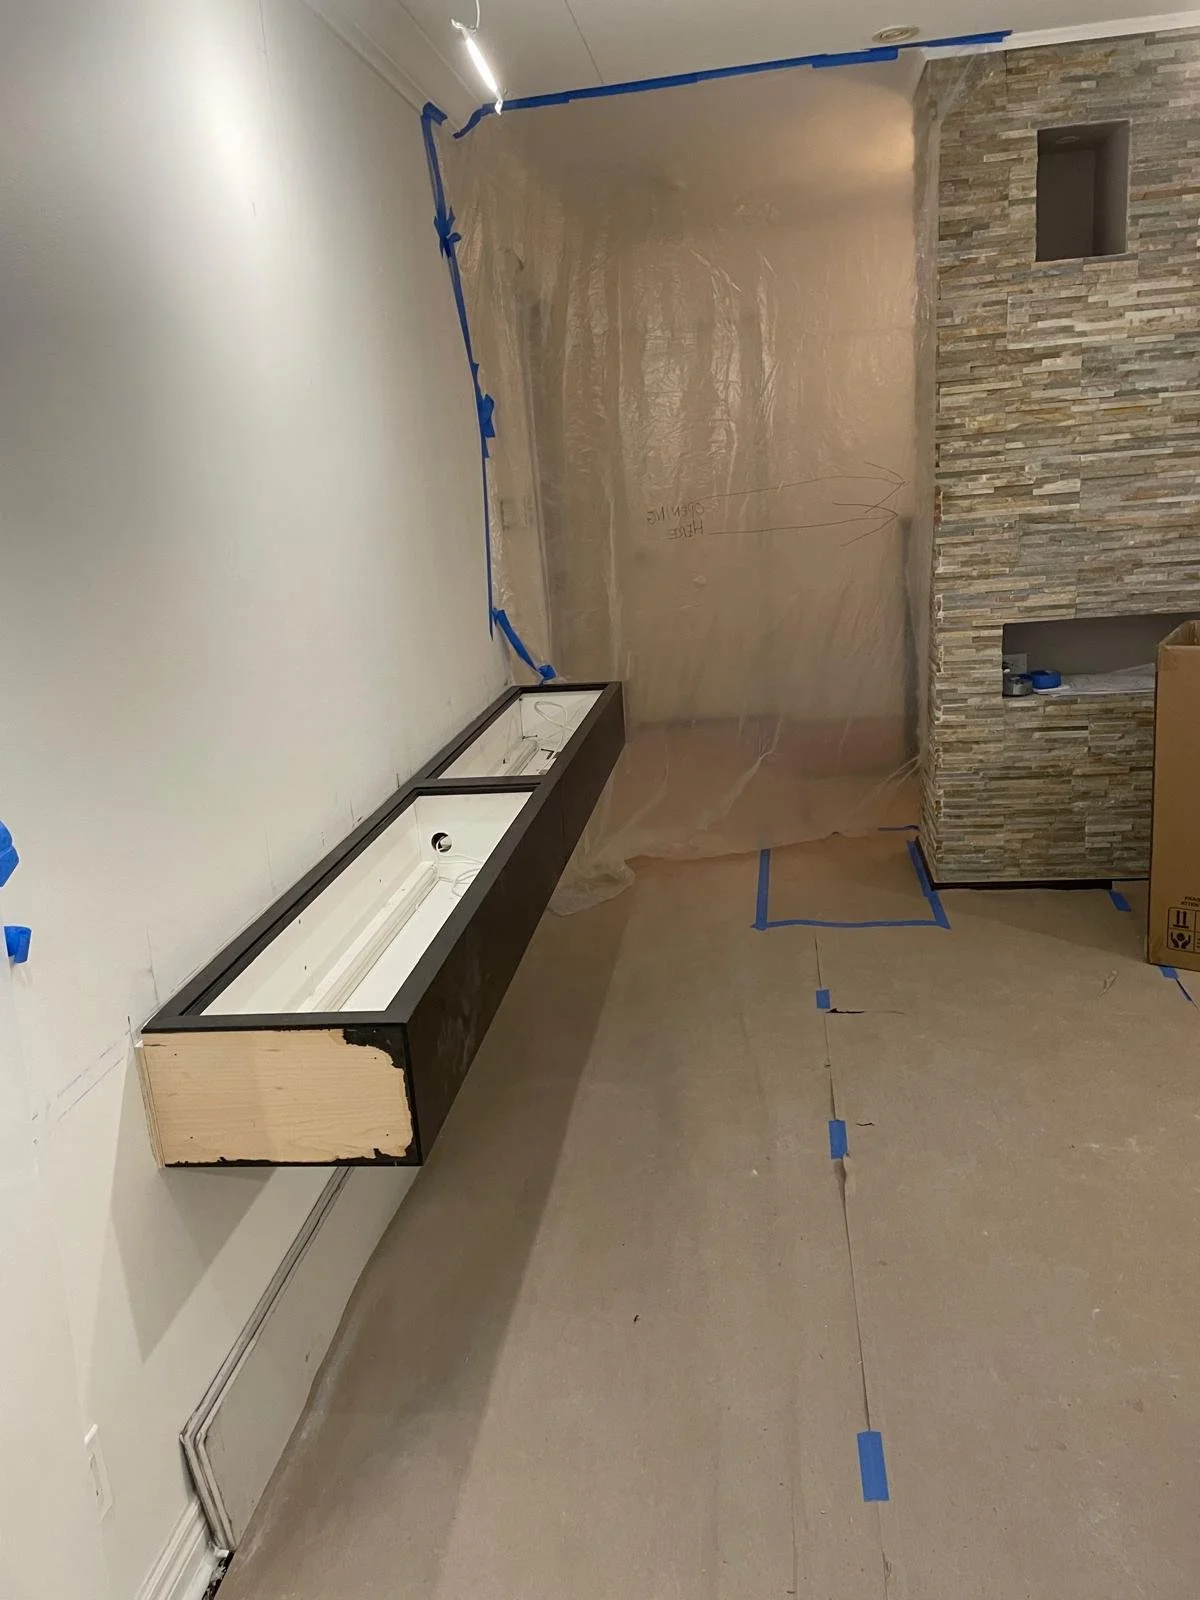
The console previously behind the sofa is relocated to another wall.

The split-face stone is removed from the wall, exposing the framed cubbies and electrical.
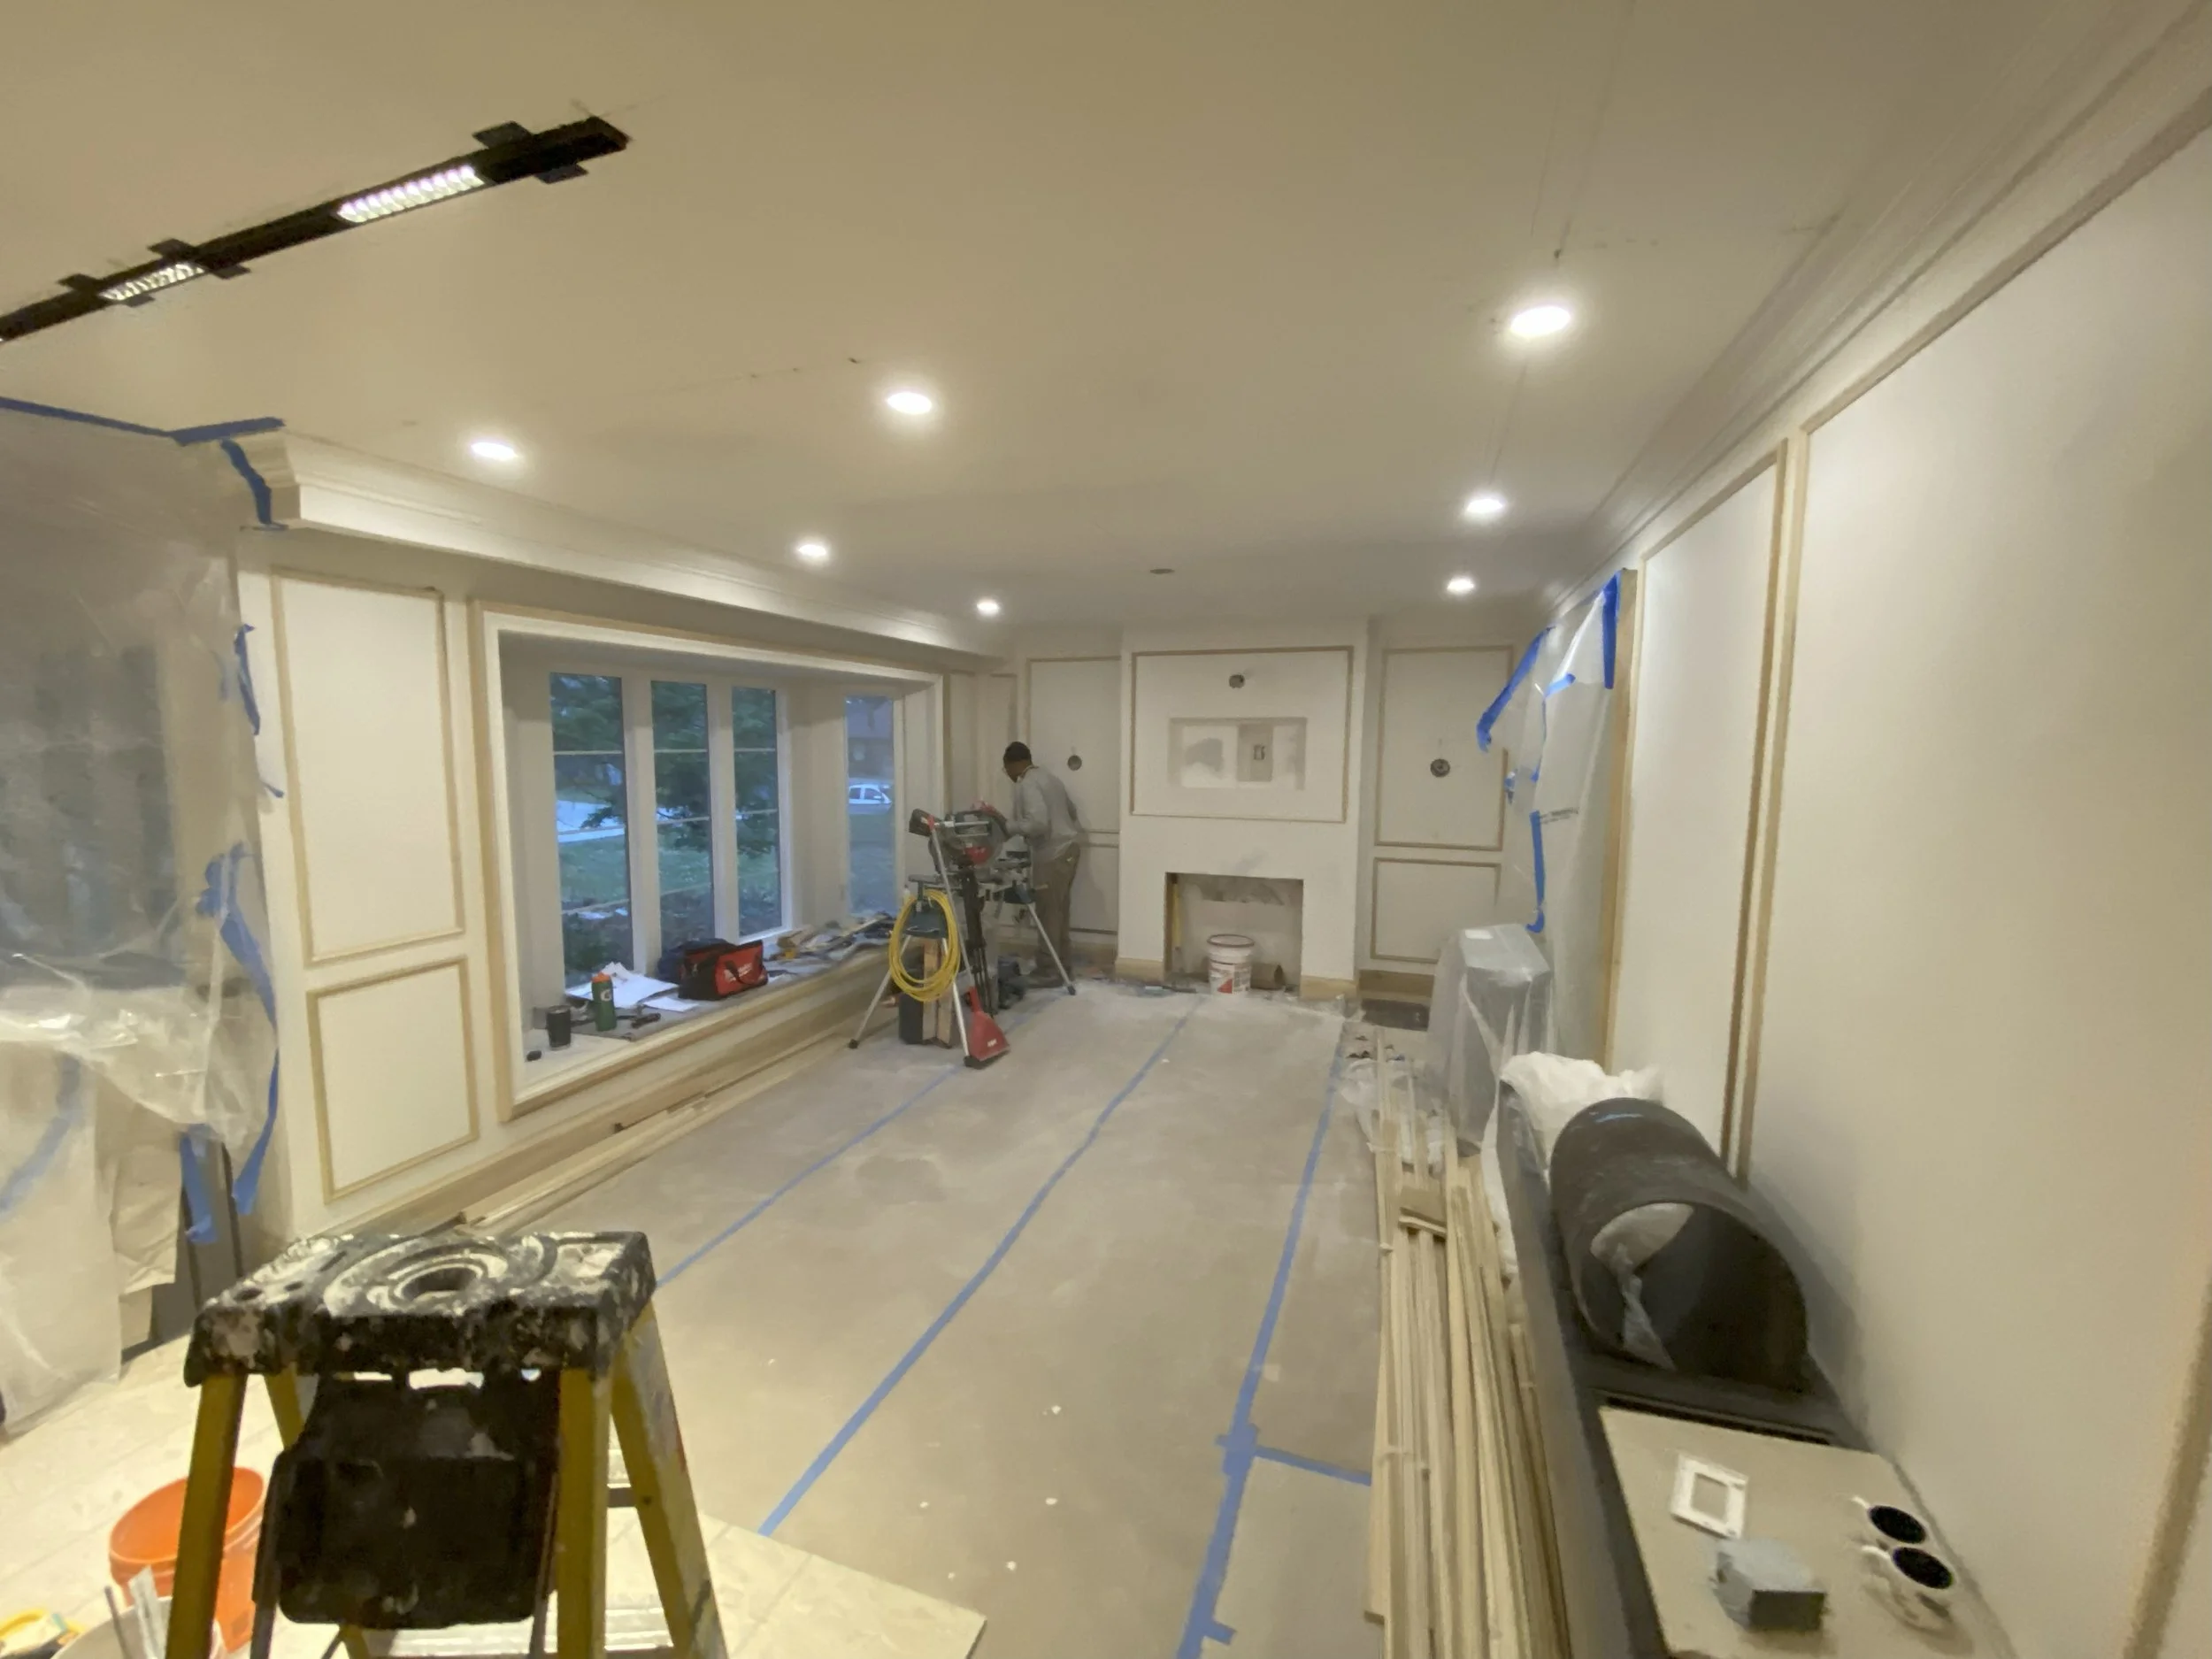
The fireplace wall is framed and the panel moulding is up.
First coat of paint is applied.
The Furnishings
We began with an initial selection of furniture, and with some back and forth with the client, created this sophisticated and complimentary selection of furniture and lighting pieces, perfectly capturing the essence of Residential Interior Design Toronto.
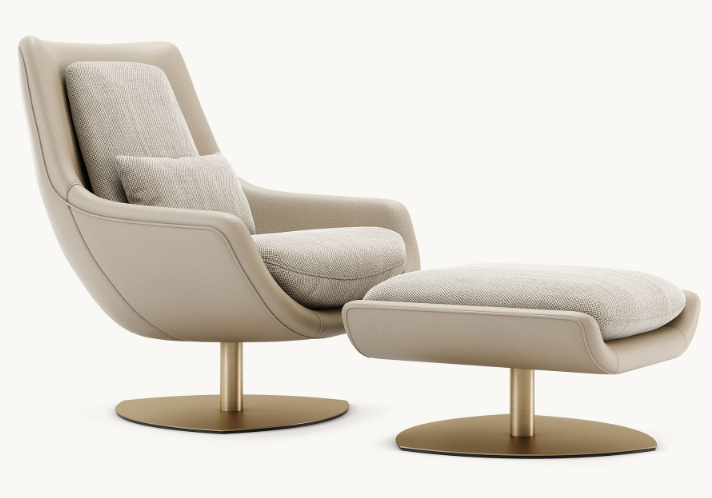
The beautiful Elba from Domkapa, supplied by Import Temptations
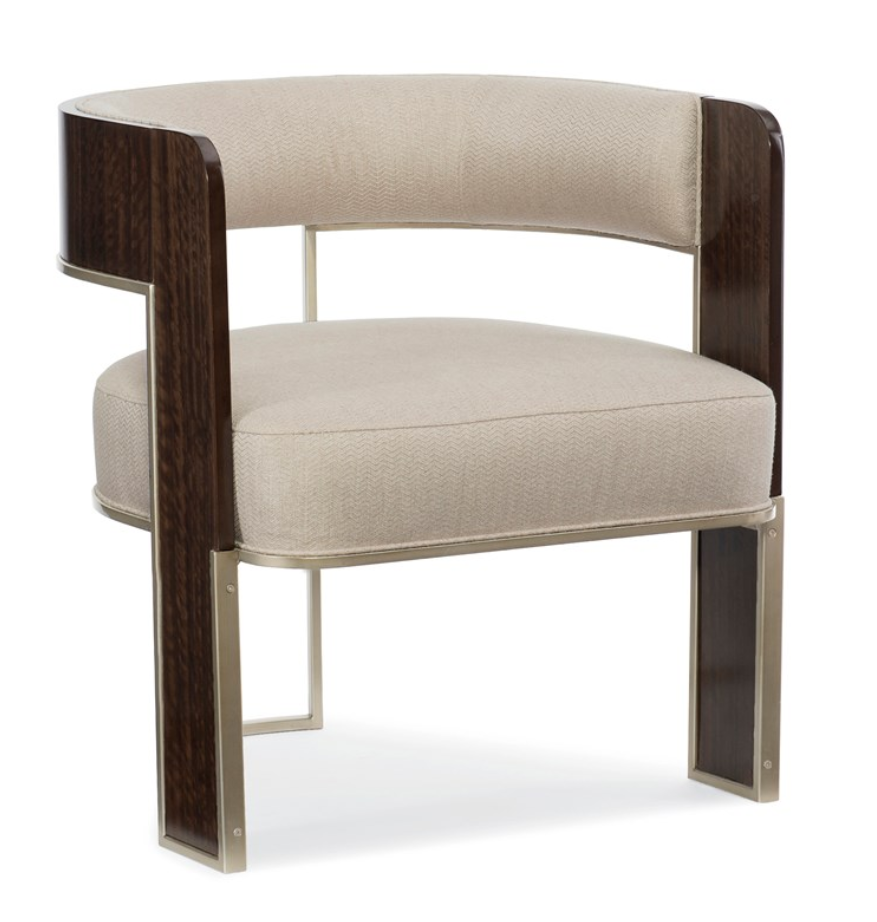
The Carocole chair, supplied by Import Temptations
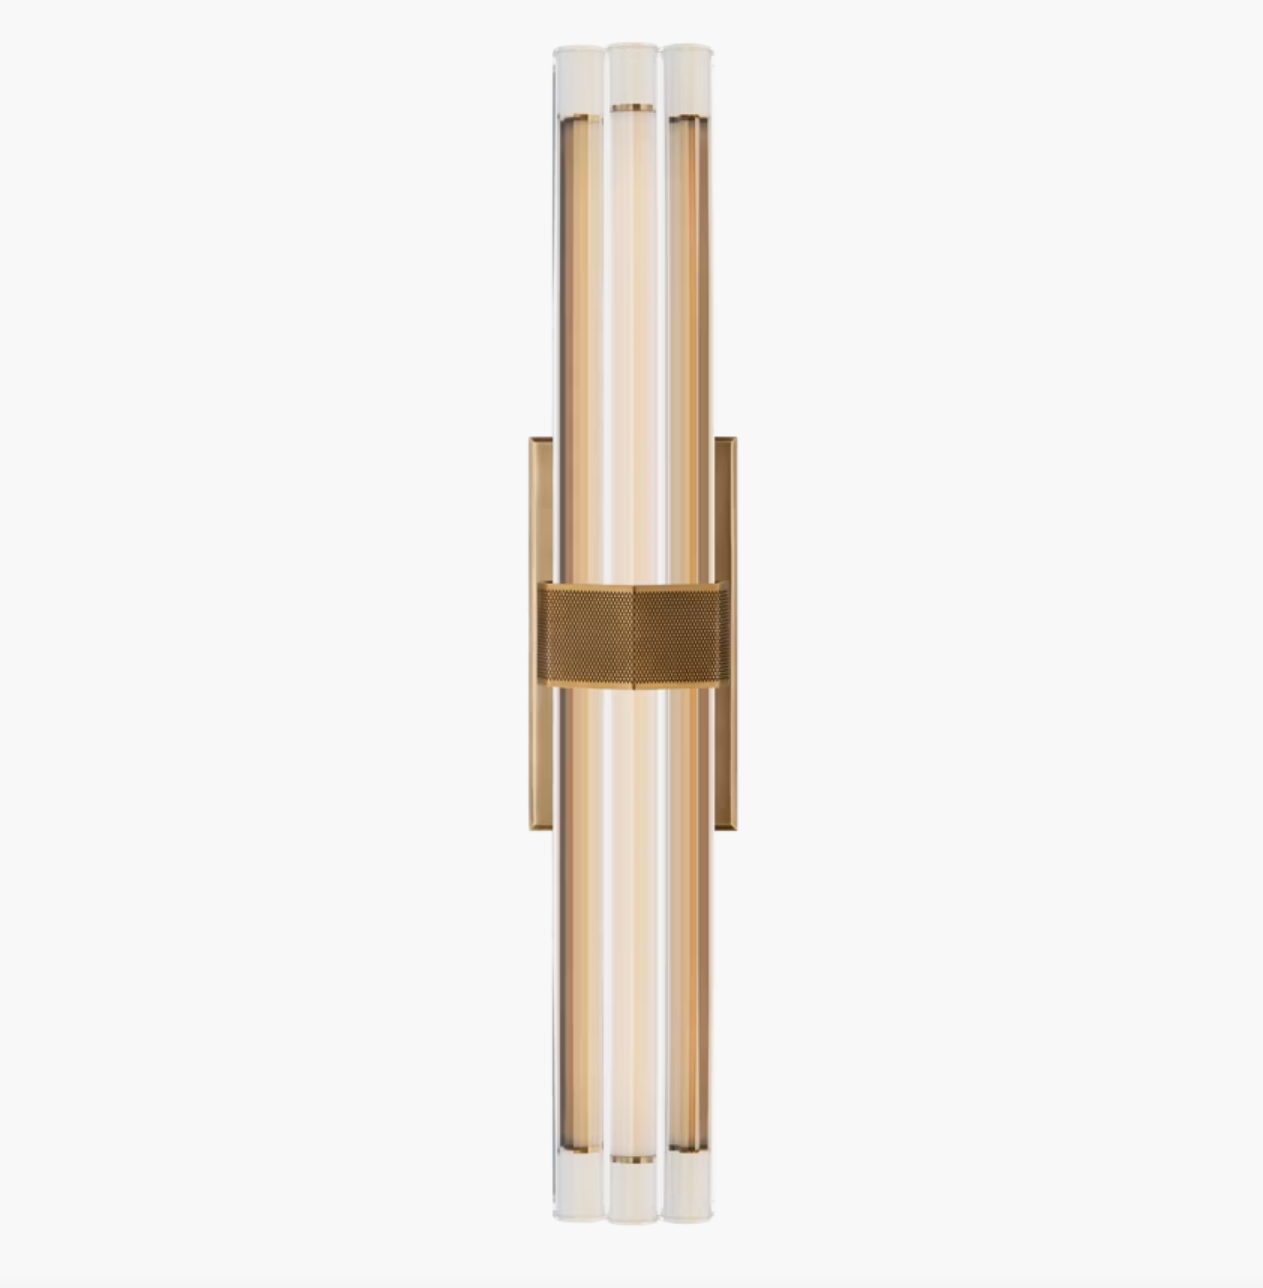
Reeded Sconce from Visual Comfort

RH inspired chandelier, customized and produced by Balder Lighting

Art Light from Elte

Custom sectional by Louis Interiors and fabric by Kravet.
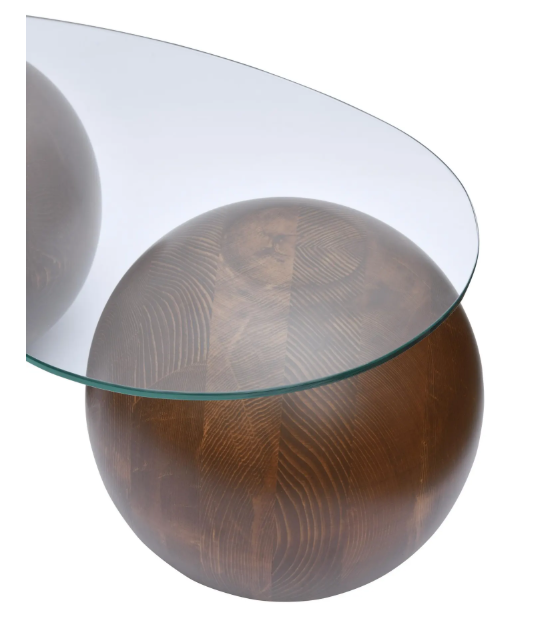
Custom sphere base table by Wood Art Atelier Co.

Felix console from Four Hands
And for the Final Product

The millwork was fabricated by AWDS, the stone supplied by Stone-Tile and fabricated by Marble Tech.
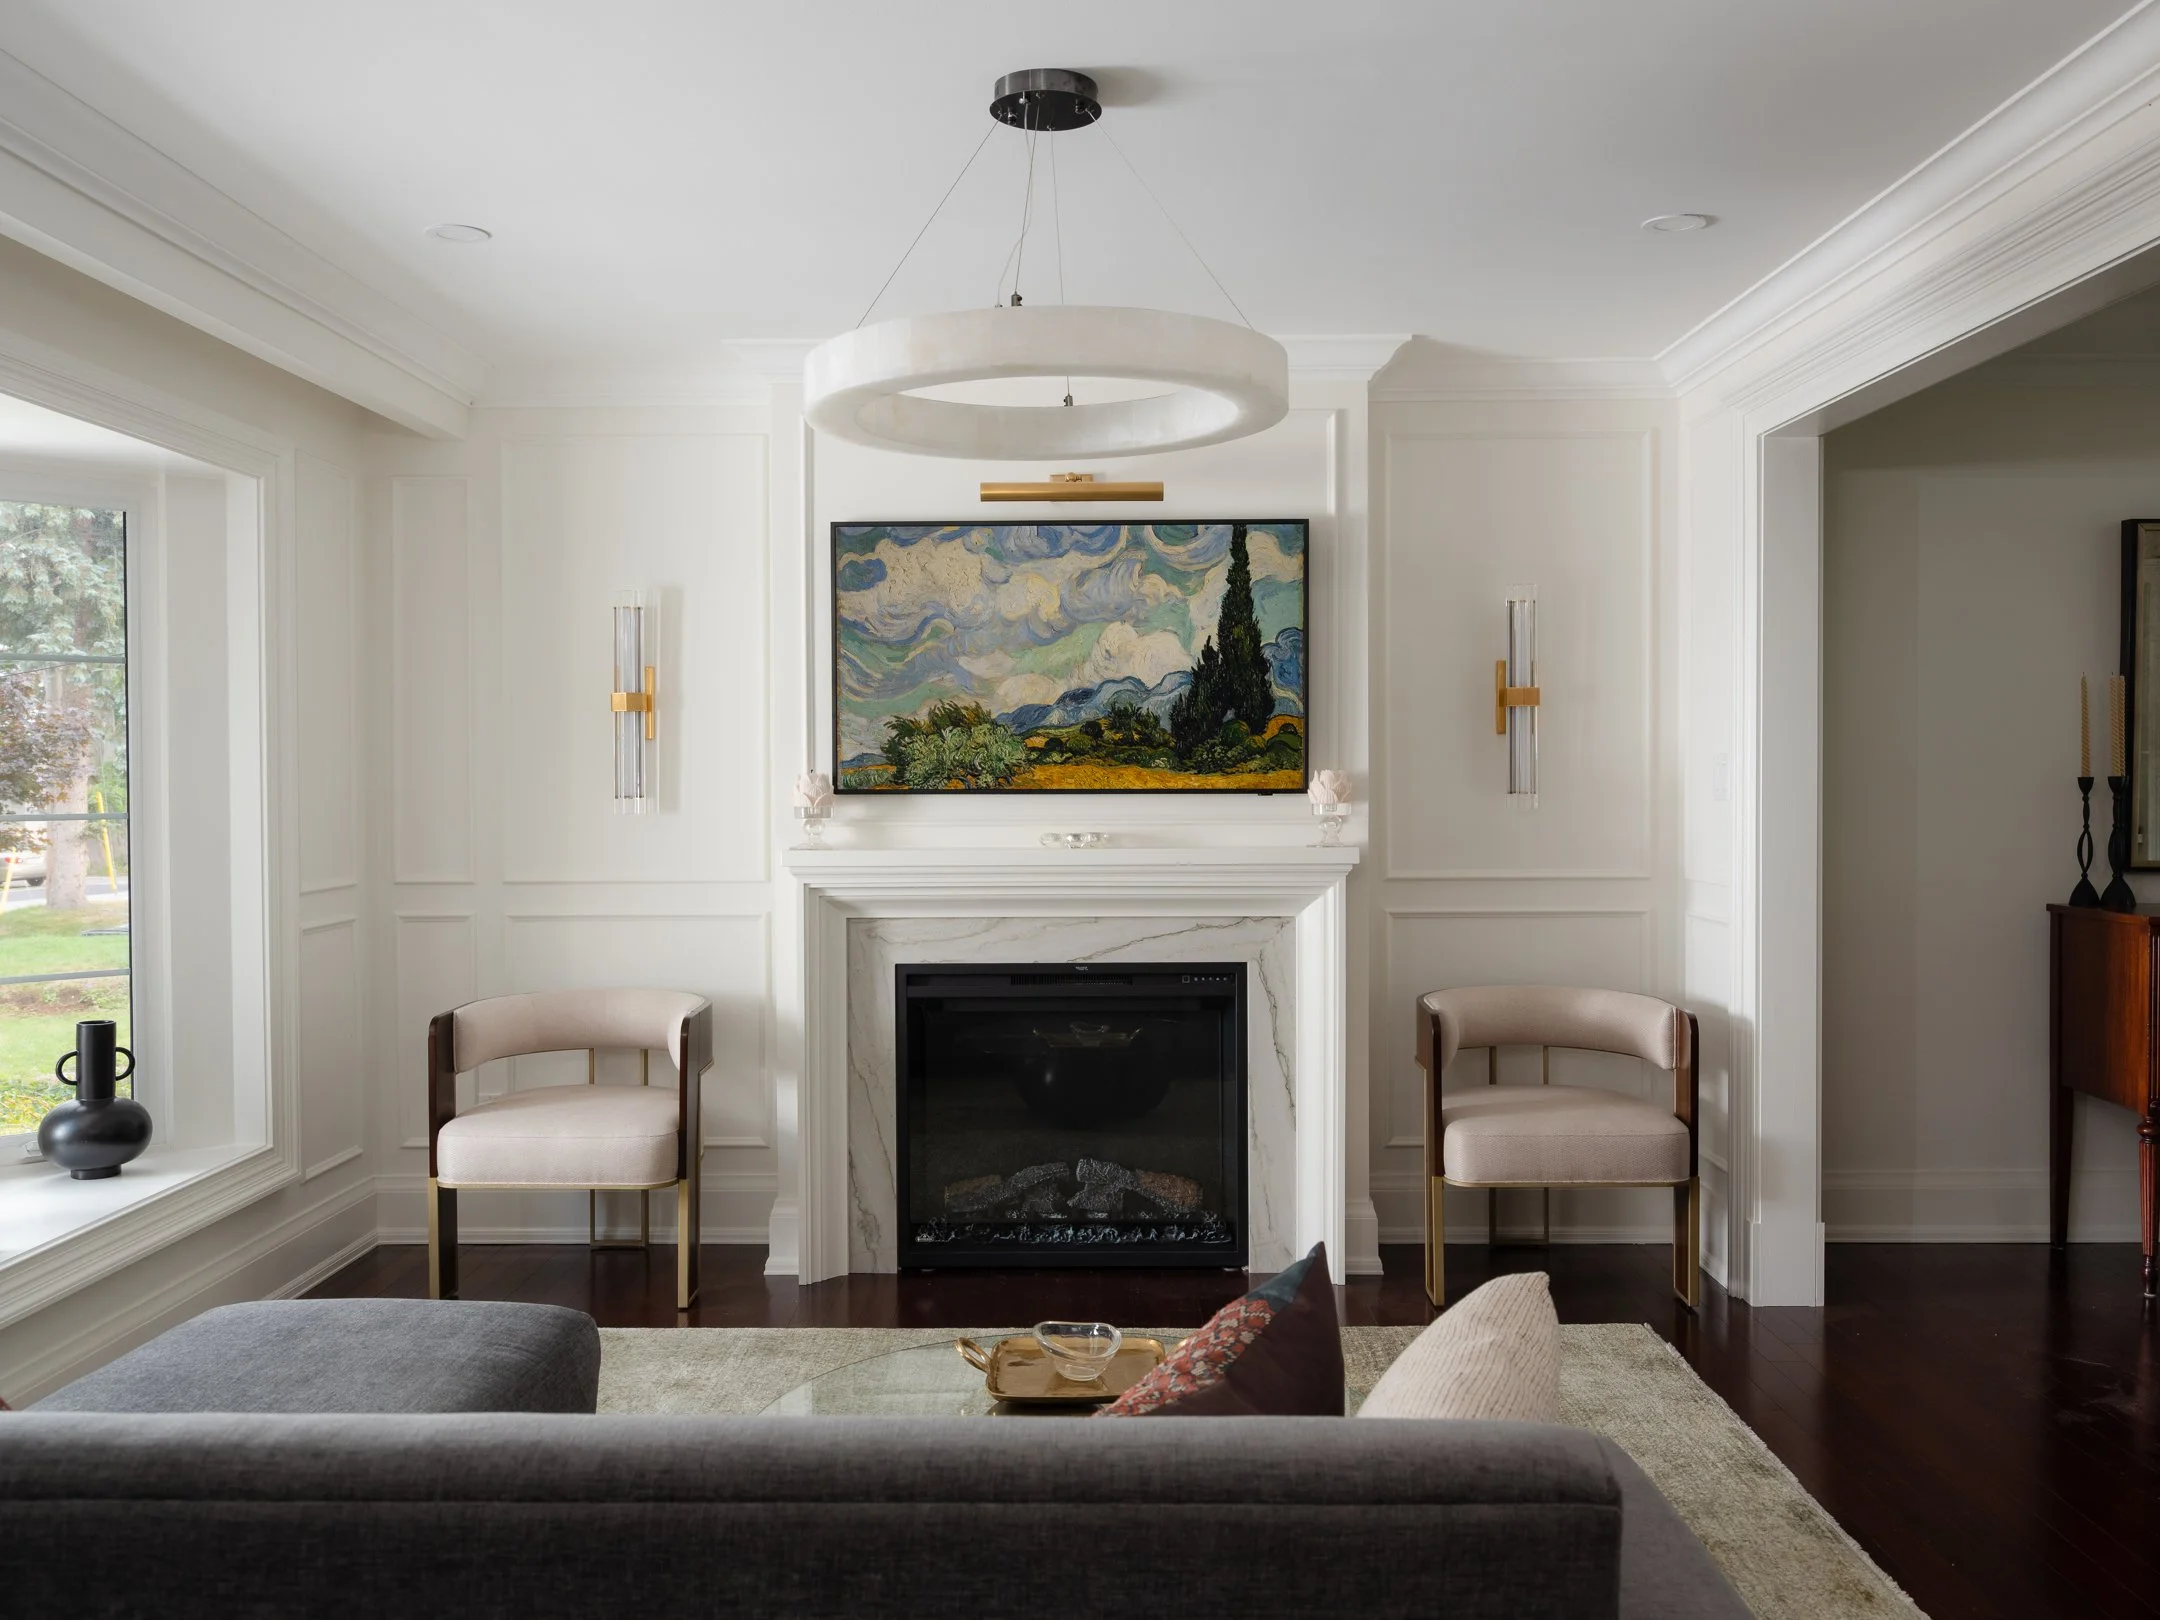
The woodworking was by Bellewoods Carpentry, and the electrical by GH Electrical.

This room now functions more effectively, and has upgraded in a timeless elevated space.

There is now increased storage in this wall with the benefit of being hidden.

The accessories are from Home Societe, and help bring out the richness and texture of every material.
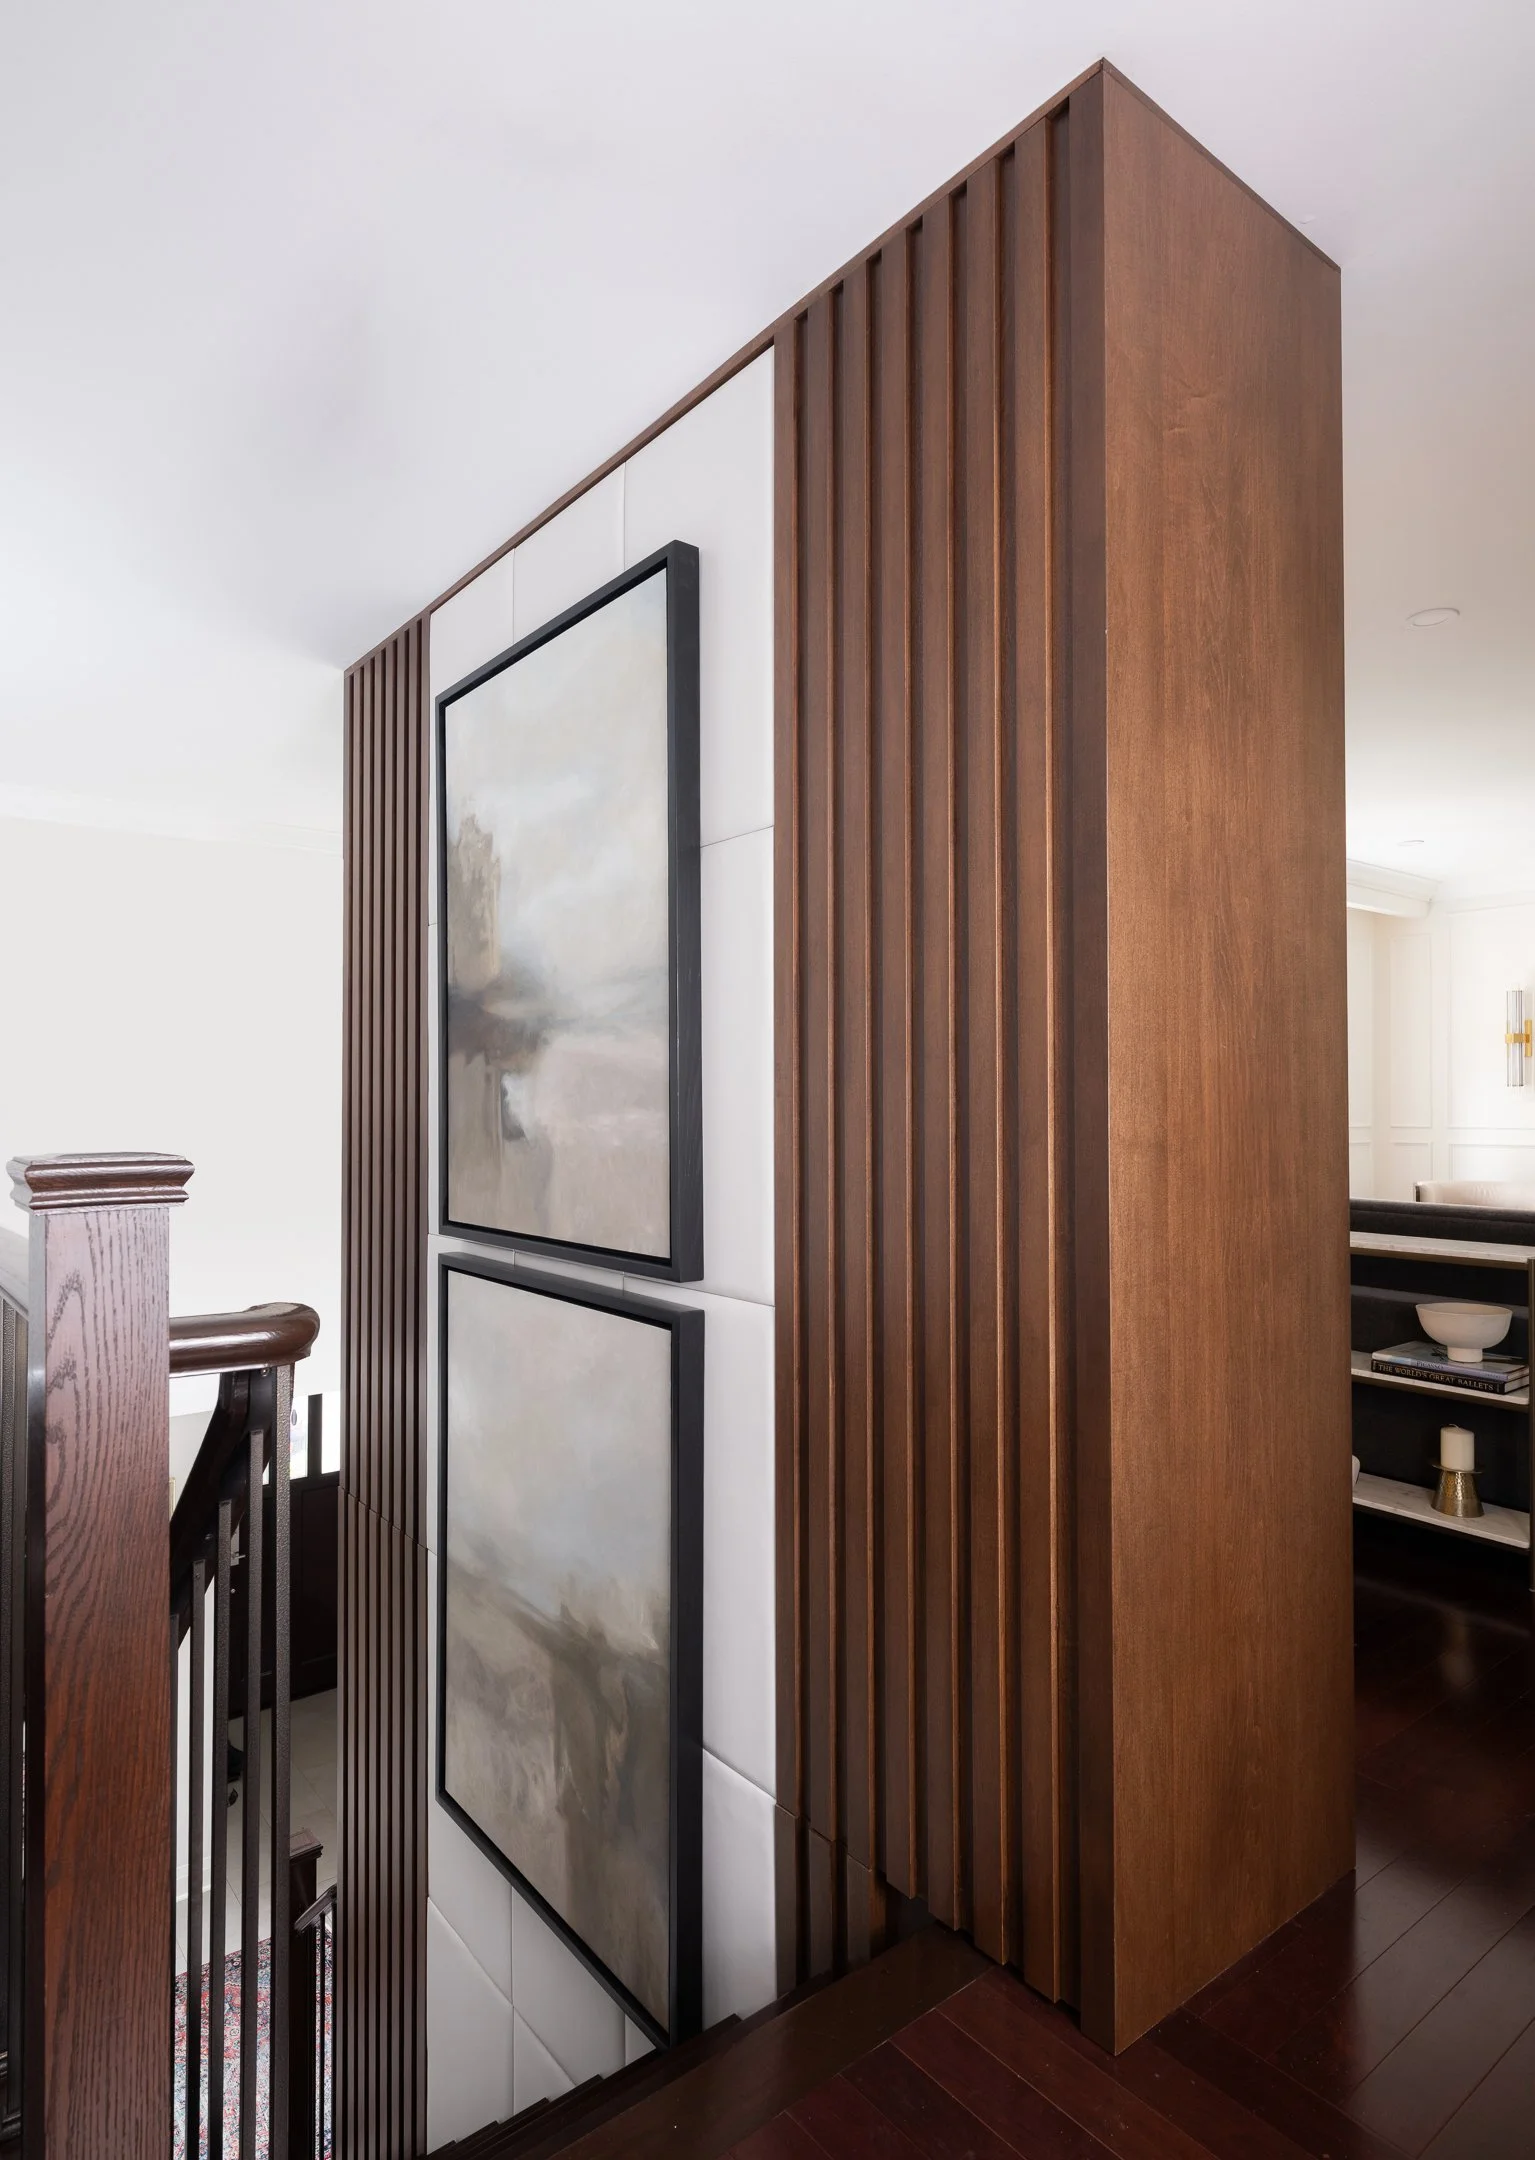
Custom artwork by Swisterski Design was created specifically for this wall installation, in oil on wood panel. Panel and frame by Night and Day Woodworking.

This double height unit greets every visitor when they enter the house. The impression it makes sets a tone of before a word is even spoken. It says ‘we have great taste, and we appreciate excellent quality.’